Posted on

7 Tips: How to Dig a Shed Slab Yourself

Hole in a ground in backyard, framed with wooden boards, filled with fresh cement about to be leveled.

This article covers a number of things to consider before you dig a shed slab, concrete path or any concrete slab. Depending on whether you want your concrete slab to sit above the ground or level with the ground, you could get away with simply boxing above ground level. However, if you plan on having your shed slab sit below or level with the ground you will need to dig a cut out or box. When digging or excavating a hole for your slab, here are some important items to consider:

  • Location: Make sure you pick a location that is level and has good drainage
  • Dimensions: Determine the size of the slab based on the size required for the shed
  • Soil preparation: Prepare the soil by compacting it and adding a layer of crusher dust
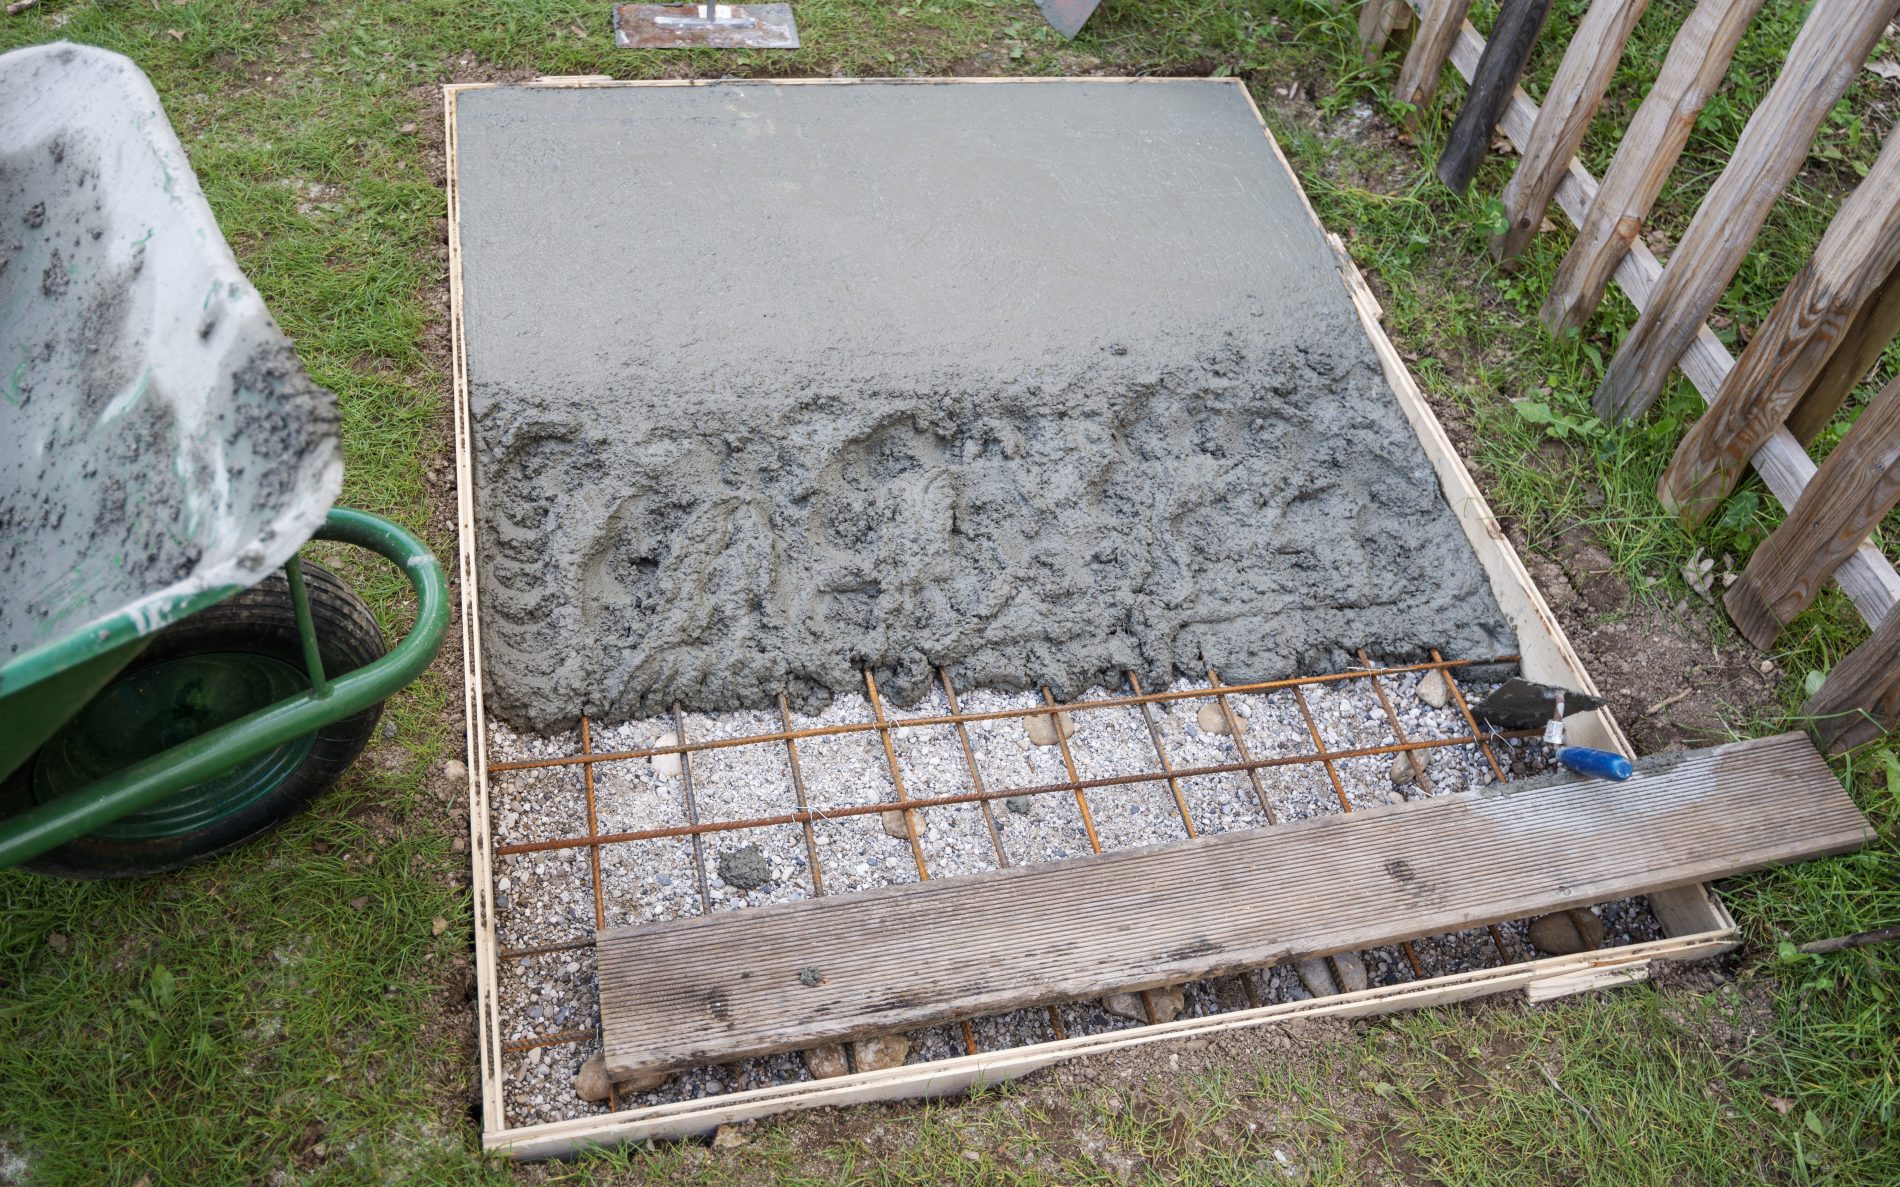
  • Reinforcement: Add rebar or wire mesh to the slab to increase strength
  • How much concrete: Ensure you order the right amount and have appropriate place to dispose any left over
  • Curing time: Allow the concrete to cure for at least 28 days before building on it

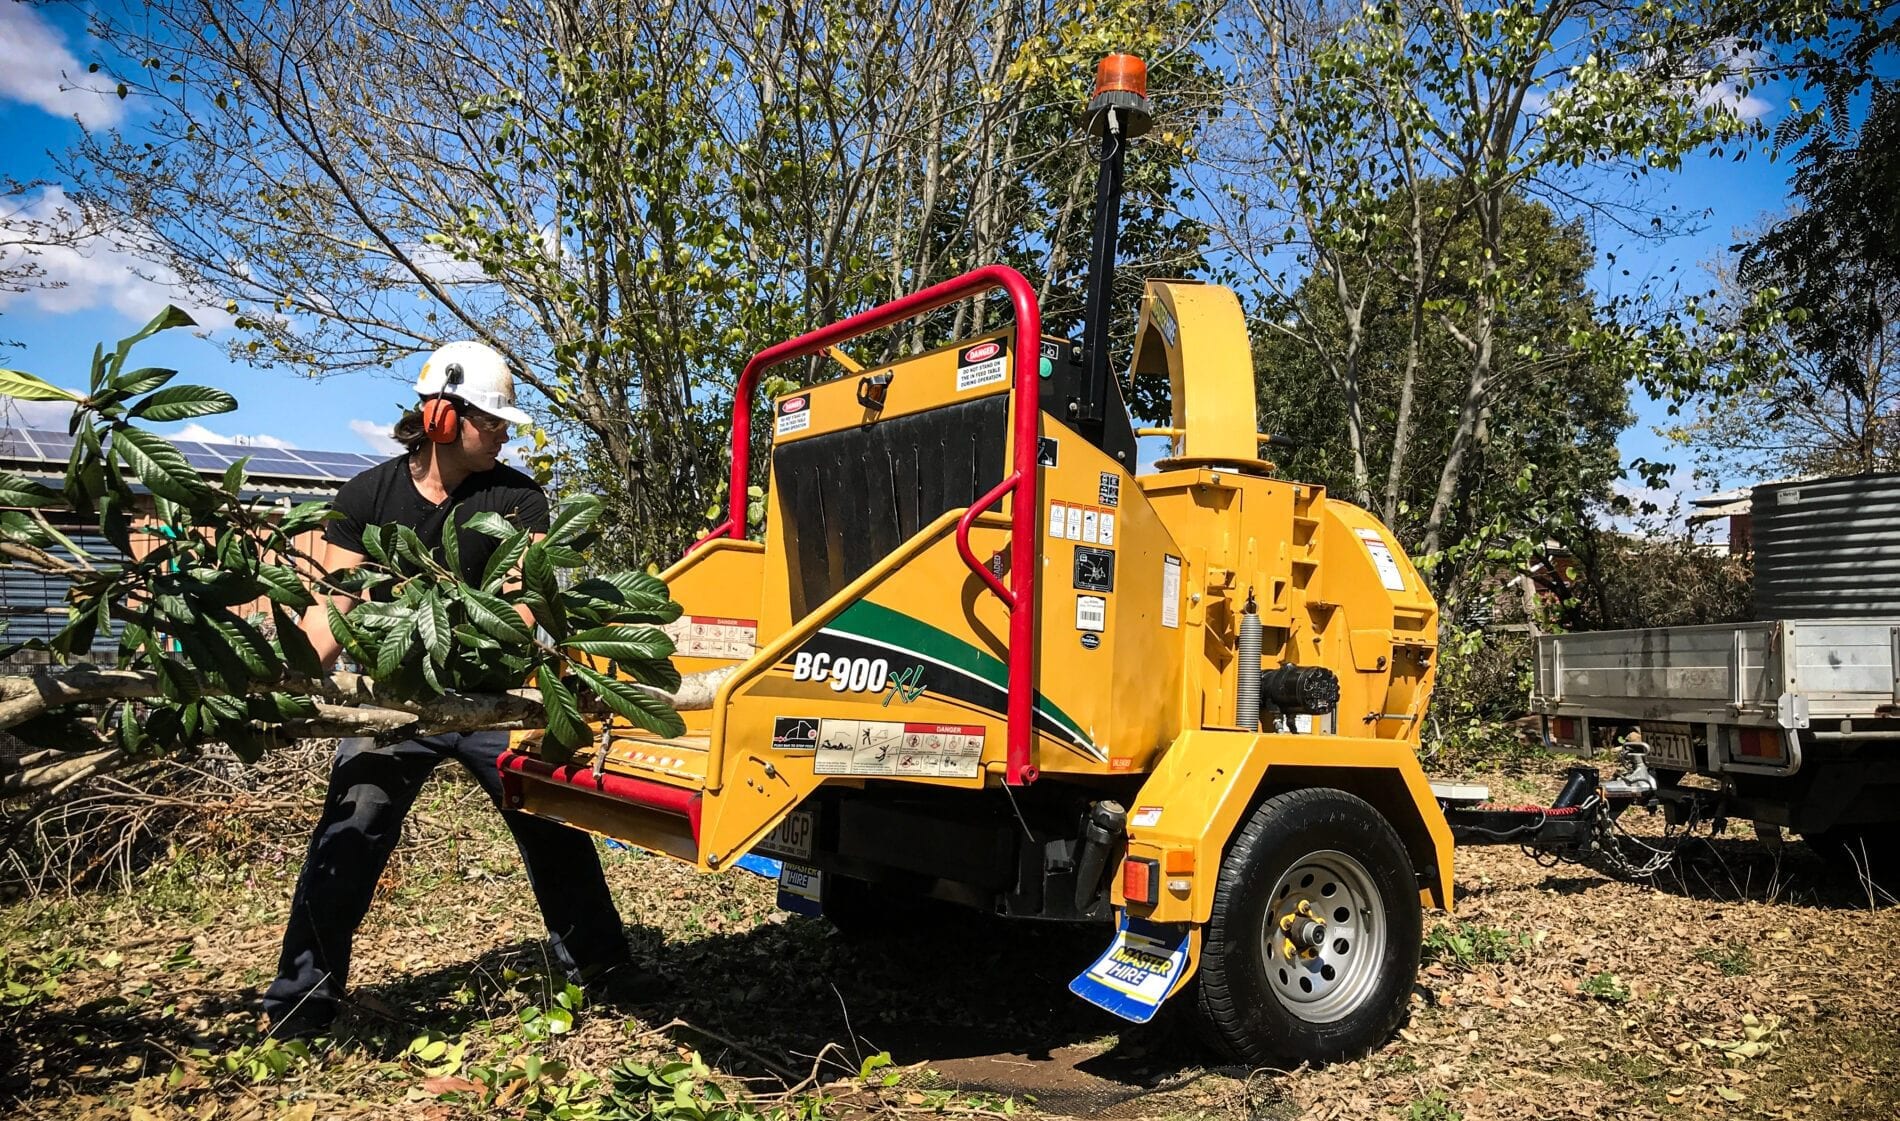
Excavation can be done by hand, dug by contractors, or done by yourself with a machine. The most common machines to do this job are Mini loaders and Excavators. Each of them have pros and cons.

Should I use a Mini Excavator or Mini Loader?

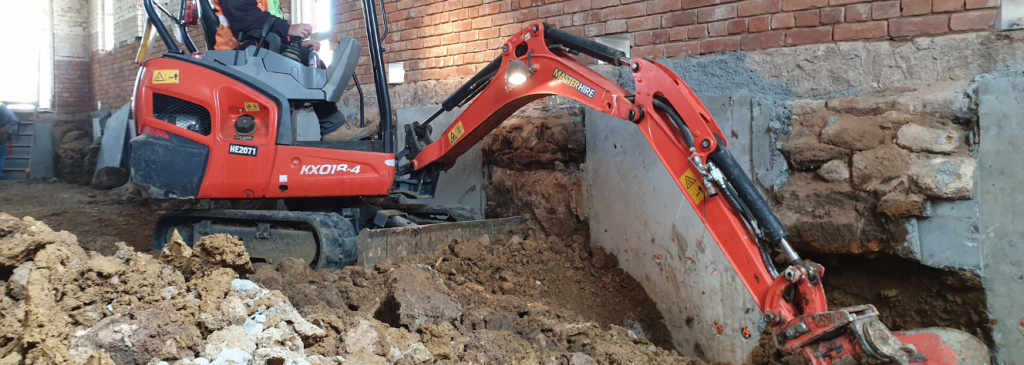
Digging down vertically with an excavator is much easier. The force that can be applied vertically is much greater than what is possible with a mini loader. Excavators typically have more vertical digging power than loaders because of the way the buckets and hydraulics are designed. These wheeled or tracked loaders are designed primarily for moving material horizontally, such as pushing or shifting dirt and their hydraulic system and buckets are optimised for lifting and carrying rather than digging.

A mini excavator is generally better than a mini loader because it is specifically designed for excavation work, with a hydraulic system that provides greater digging power and precision. The excavator’s boom, arm, and bucket are designed to dig into the ground and remove material efficiently, which makes it ideal for digging holes or trenches, or pits.

In contrast, a mini loader is primarily designed for material handling and transportation, such as moving, scraping or pushing dirt or gravel from one location to another. While a mini loader can be equipped with an attachment like an auger to drill holes, it may not be as efficient or precise as a mini excavator in terms of digging depth and accuracy.

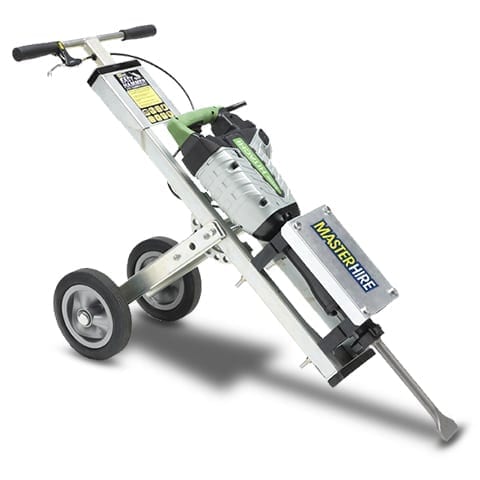
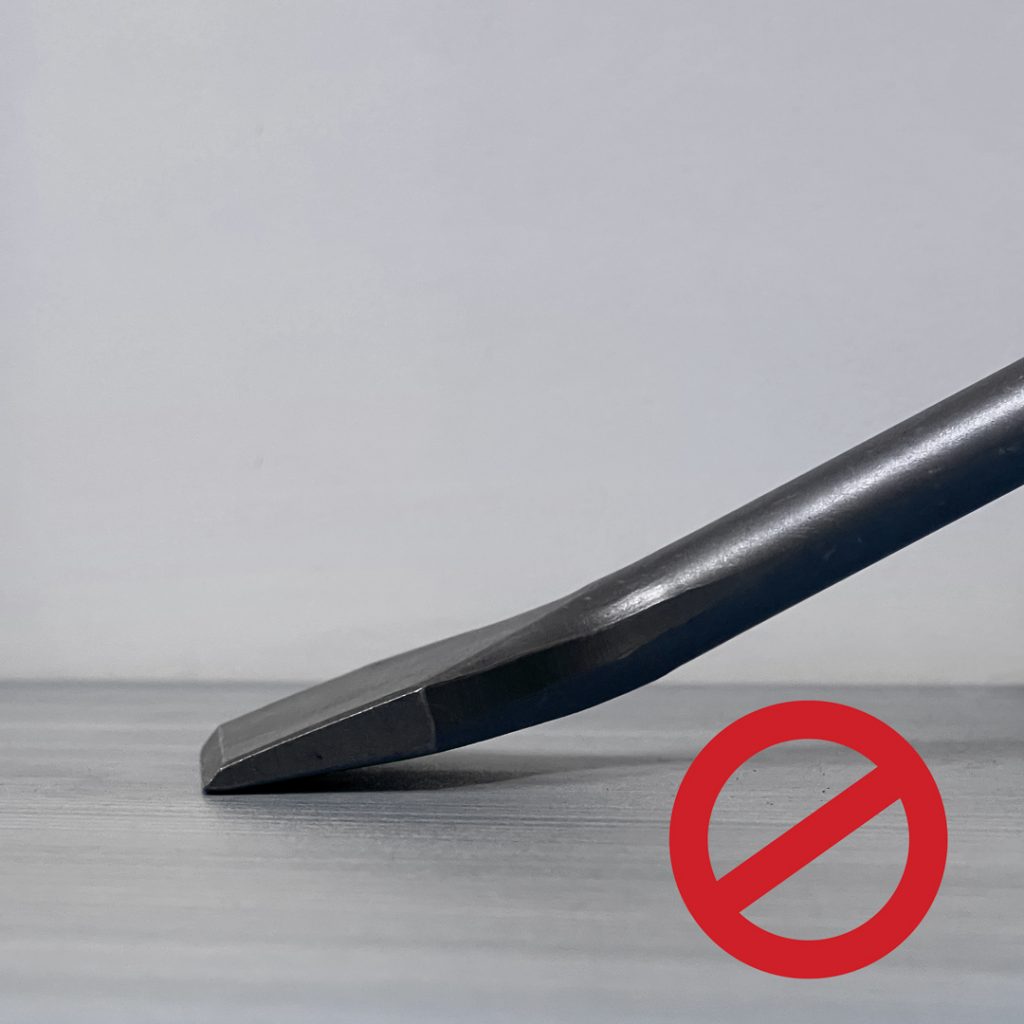
Digging down with a mini loaders can be hard for the machine depending on how heavy the loader is. Because we are talking about machines that weigh roughly 900kg to 1200kg you will often find the bucket will just scrap along the surface, particularly if the ground surface is compacted and hard. Tools like rippers, do a great job of breaking up the compacted soil to allow the wider buckets to push through and collect loose soil. Master Hire has ripper attachments for mini loaders and mini excavators. Mini excavator buckets typically have teeth on each of the trenching buckets. These teeth act as rippers and are designed to pierce through the tough compacted layers of dirt and break it up making it much easier to dig.

How do I prepare the ground for a shed slab?

Preparing the ground for a shed slab requires careful planning and attention to detail. The first step is to clear the area of any debris or obstacles, such as plants, rocks, or other obstructions. work out how deep you need to dig down for your slab, this will include the thickness of your concrete plus an appropriate extra amount of depth for any crusher dust or gravel. It’s important to level the ground to ensure a uniform thickness for the concrete slab. This can be done using a shovel, rake, and/or a laser level to ensure the ground is level and smooth.

Earthmoving tools can make the job of preparing the ground for a shed slab easier and more efficient. For example, a mini excavator can be used to clear the area of debris and level the ground, which is faster and more precise than doing it manually with a shovel and rake. They can also dig a trench for the foundation and remove any roots or large rocks that may be in the way. This can be especially useful if the ground is uneven or has a lot of obstacles, as it can save time and effort compared to doing it by hand.

How thick should a garden shed slab be?

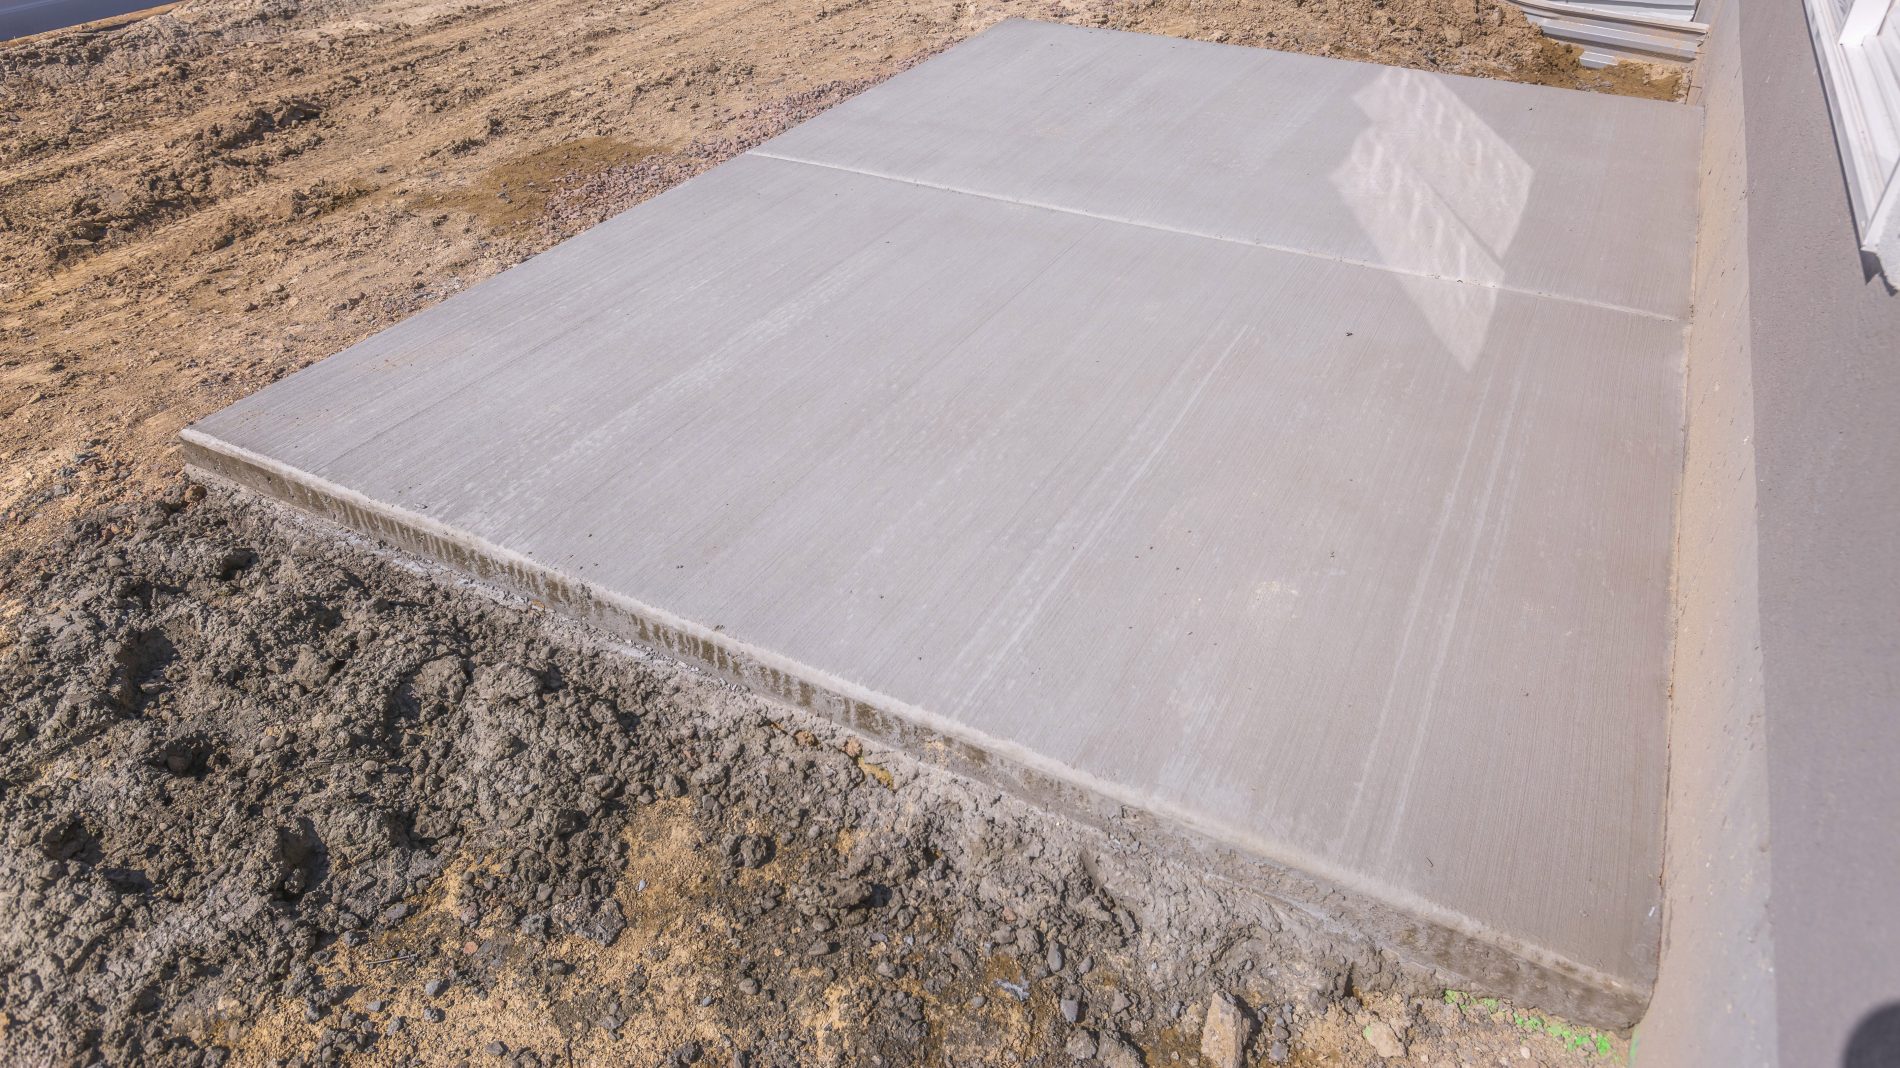
If the shed is relatively small and light, a 4-inch-thick concrete slab should be sufficient. As a general rule, a thickness of around 100mm (4 inches) is recommended for most applications. The thinner you make your concrete the more you save but it becomes brittle and for this reason you should go not below 50mm (2 inches) thick.

How deep should you dig before pouring concrete slab? A typical garden shed slab is 100mm thick and we recommend at least 50mm of crusher dust under your concrete which brings it to a total of 150mm deep.

Flat horizontal concrete surface soil at a home under construction. Construction work at the yard of a a new house with no landscaping.

How thick does concrete need to be to not crack?

As a general rule, a thickness of around 100mm (4 inches) is recommended for most applications. The thinner you make your concrete the more brittle it becomes for this reason you should go not below 50mm (2 inches) thickness. Thicker concrete is also more prone to cracking and it is recommended you don’t go over 125mm. It’s also important to ensure that the slab is properly reinforced with steel rebar or wire mesh to increase its strength and durability.

Do I need gravel under concrete slab?

In general, it’s recommended to place a layer of gravel or crushed stone underneath a concrete slab to provide a stable base and improve drainage. The gravel should be compacted to ensure that it is solid and does not shift or settle over time. This layer of gravel helps prevent water from pooling beneath the concrete, which can cause issues such as erosion, cracking, or heaving. The gravel layer also helps to distribute the weight of the concrete more evenly, reducing the risk of settling or cracking. In summary, while it’s possible to pour concrete directly onto soil or sand, using a layer of compacted gravel can provide a stronger, more stable foundation that promotes better drainage and helps prevent potential issues down the road.

Gravel for the base for a footpath

How much gravel is needed under a concrete slab?

The amount of gravel needed for a concrete slab depends on the dimensions of the slab and the thickness of the gravel layer used. Typically, a gravel layer between 2 and 4 inches (50mm – 100mm) thick is recommended for a concrete slab. You can pour concrete directly onto dirt however, its not recommended as soil can move, swell and crack with moisture content. Over time this can collect moisture underneath and cause the slab to crack. Proper preparation of the ground is necessary to ensure the stability and longevity of the slab.

Laser Level in Use

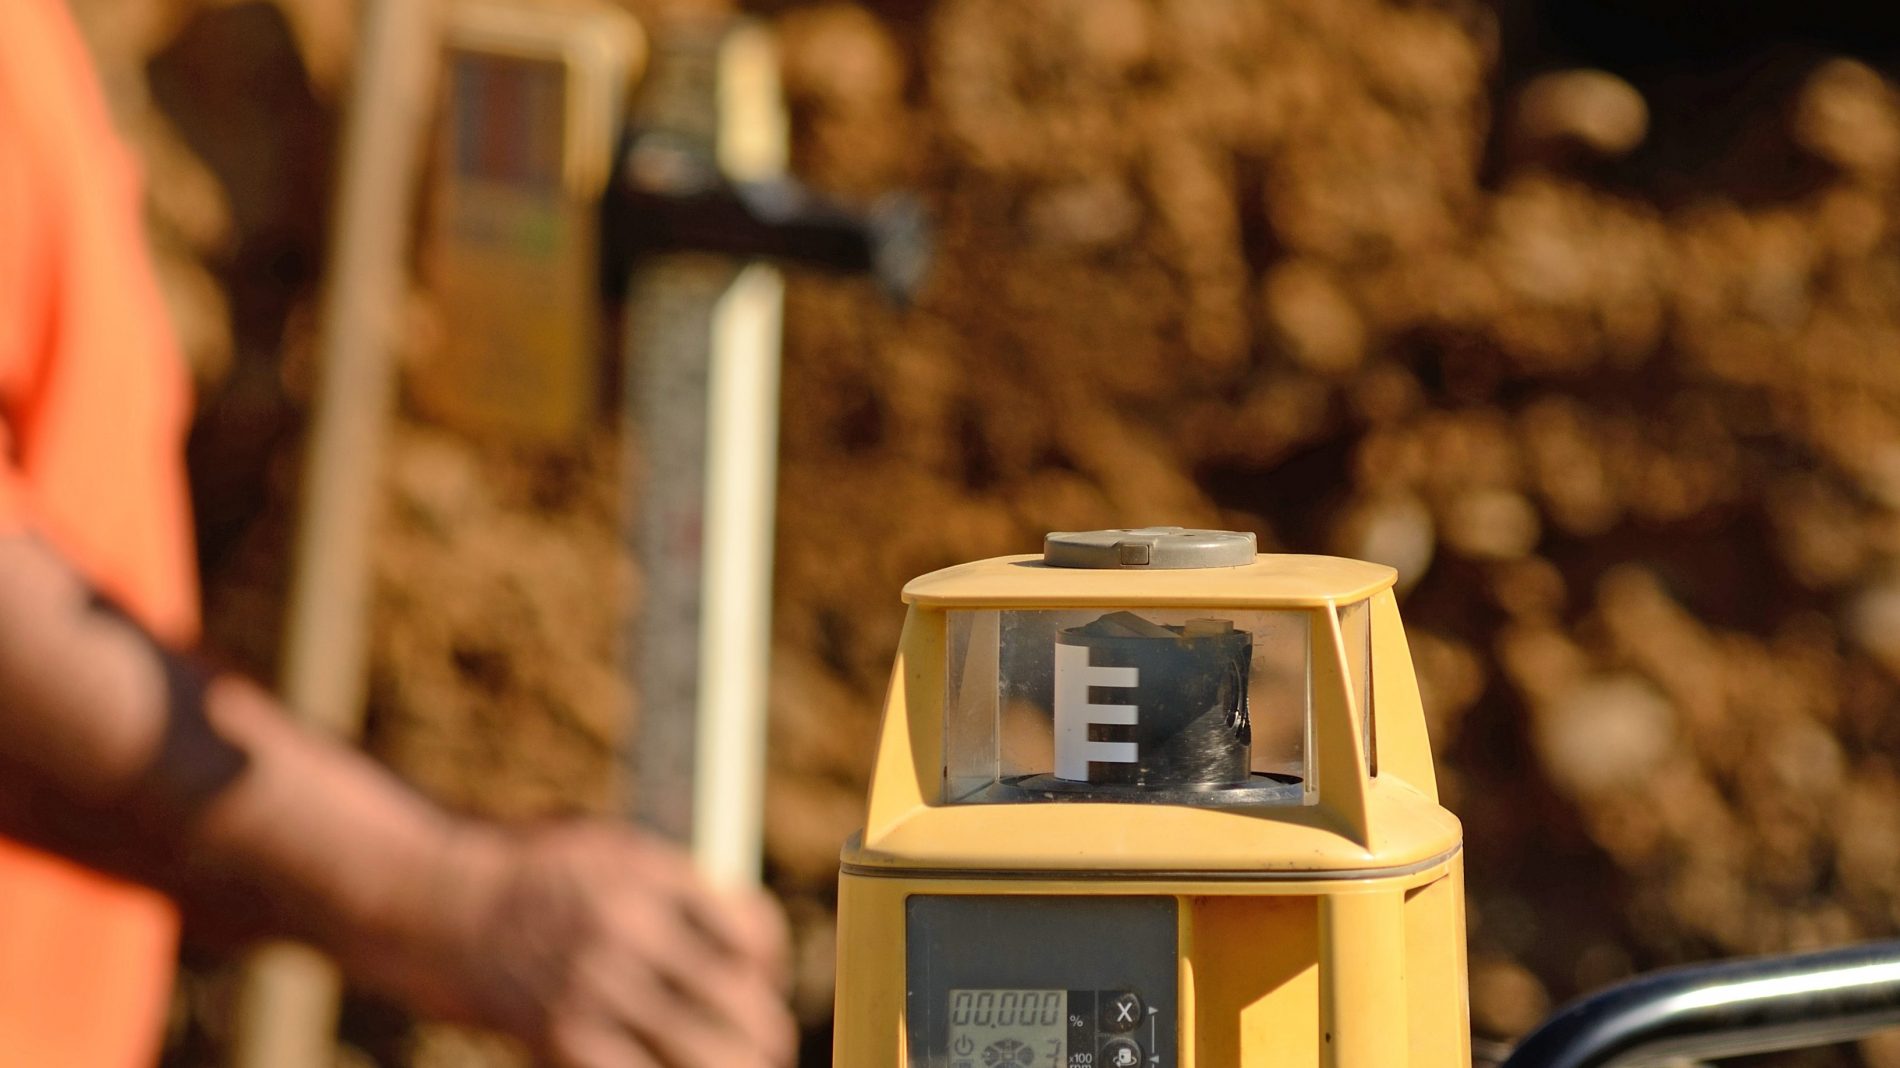
It’s important to make sure your concrete is level

It’s important to ensure the slab you are about to pour is level and it can be tricky to work out how level you have dug your shed slab. Using a laser level or a DIY water level will help ensure that the majority of your cut out is level and in turn the thickness of your slab remains consistent everywhere.

You can use a level to make sure each corner is at least 150mm deep, and then measure different points all over the slab you have a consistent depth of 150mm throughout (100mm thick slab with 50mm of crusher dust). At points where you are too deep you can use crusher dust to fill in those gaps, but high spots can leave the concrete too thin and should be taken down to match that level. It’s recommended you compact crusher dust and soil before pouring concrete, so you don’t create voids under your slab.

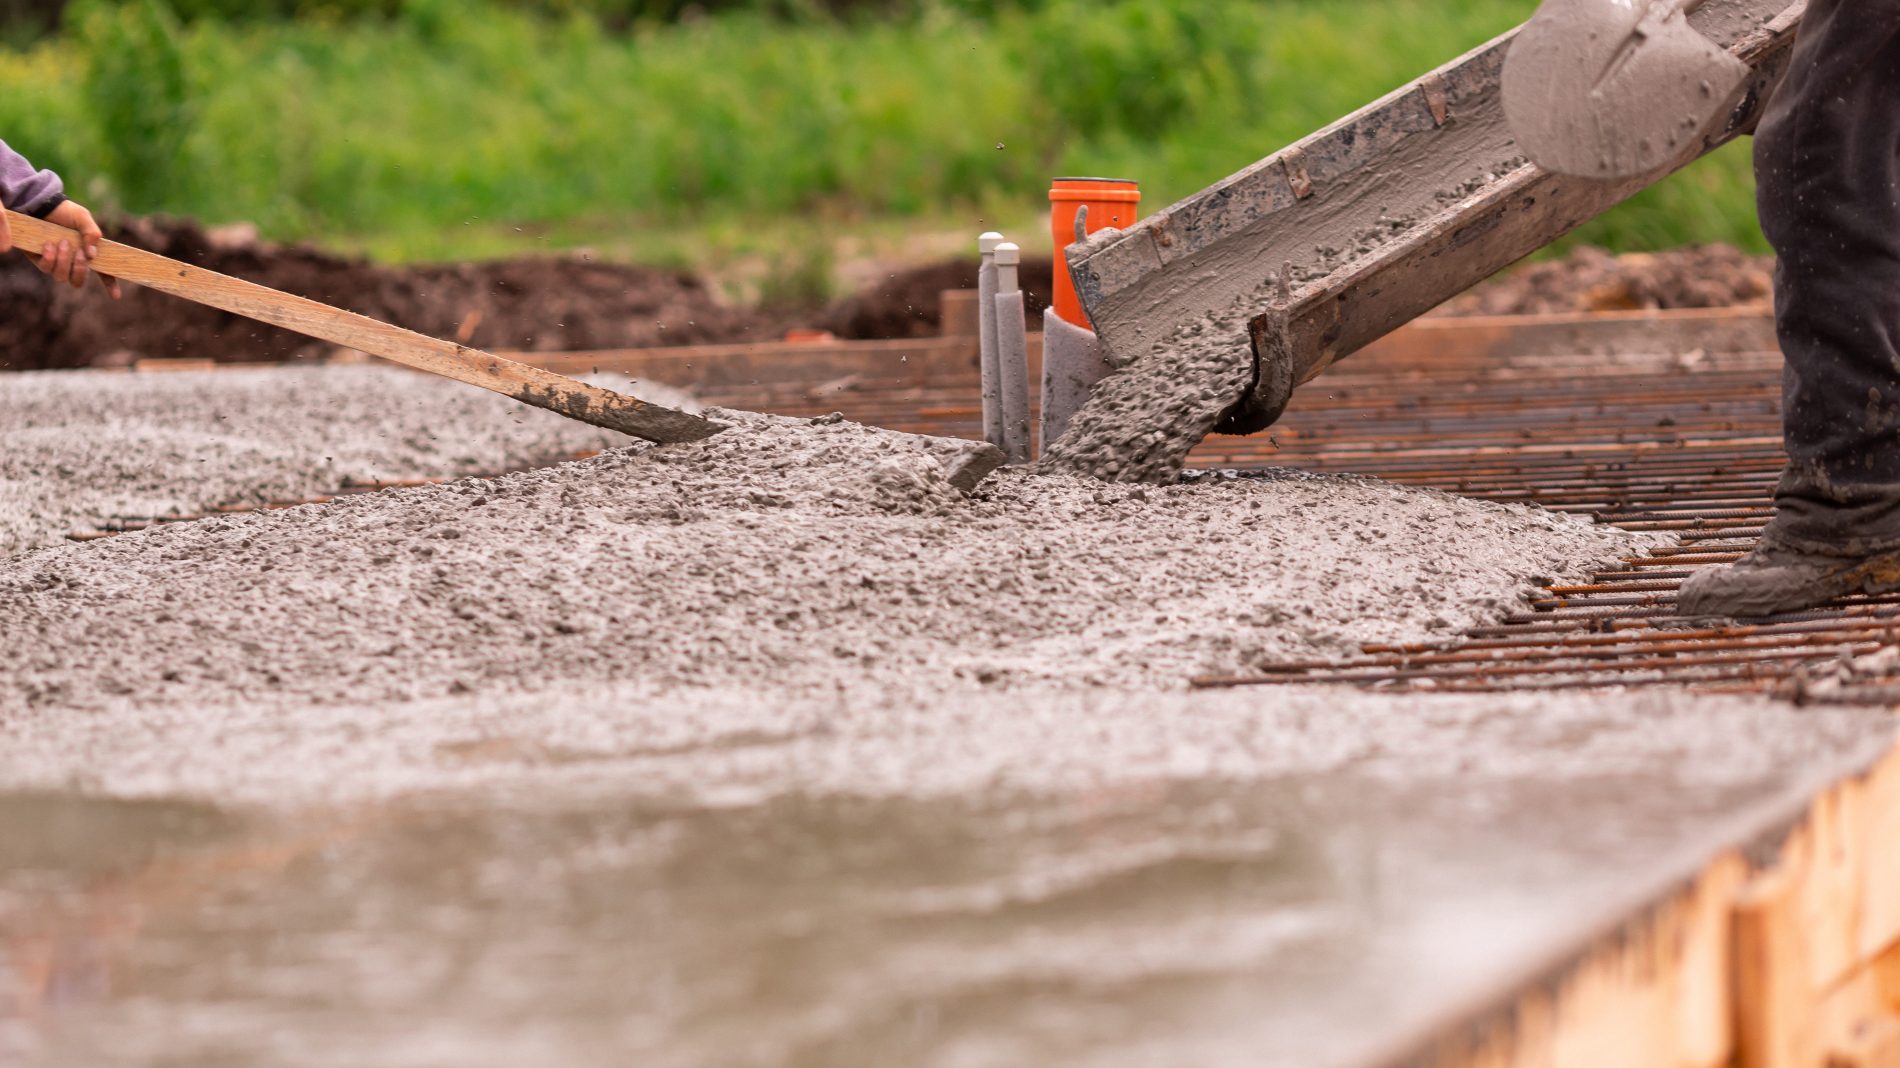
How do I work out exactly how much concrete I need to order?

Work out the dimensions of the slab by measuring the length, width, and thickness of the slab in meters. Convert the dimensions to cubic meters by multiplying the length and width, and then by how thick the slab needs to be. For example, if your slab is 3 meters long, 2.5 meters wide, and 100 millimetres (0.1 meters) thick, the calculation would be: 3m x 2.5m x 0.1m = 0.75m3 (cubic meters).

We recommend consulting a concrete supplier who can provide a more accurate estimate based on the specific mix and delivery requirements. They may have minimum cubic metre order amount and you should have a plan of what to do with left over concrete as they often charge to take excess wet concrete away.

Lay of the cement or concrete into the foundation formwork from concrete mixer. Building house foundation

How long should a slab sit before building on it?

Curing is a critical process for concrete slabs that involves maintaining an optimal moisture level and temperature to ensure that the concrete sets properly. While the 28-day curing period is a general guideline, the actual curing time can vary depending on factors such as the type of concrete, the thickness of the slab, and the weather conditions.

The temperature and humidity during the curing process can significantly impact the rate at which concrete sets. If the weather is hot and dry when you pour your slab, the concrete can set too quickly, which can cause cracking. On the other hand, cold or wet weather can delay this curing process. That’s why it’s important to avoid any heavy loads or structures on the slab during the curing process to prevent any damage or weakening of the concrete.

Concrete that has not fully set is often referred to as green concrete. Not to be confused with Eco friendly green concrete. Concrete that is produced using eco-friendly materials and practices is also sometimes called green concrete or “environmentally friendly concrete” or “sustainable concrete.”

Choose Master Hire for all your earthmoving hire requirements

At Master Hire, we understand that every project is different, that’s why we have a wide range of earthmoving equipment available to suit all your needs. Our team of experts is always on hand to provide advice and guidance on which machine will be best for your project, so you can get the job done quickly and efficiently.

Posted on

Bathroom Renovation Made Easy: Learn How to Remove Tiles with Confidence

Tile removal is a task that requires a significant amount of physical labour and can be a time-consuming process. It’s important to budget and plan for the task accordingly, taking into consideration the size of the area to be covered, the type of tile to be removed and the tools and equipment required to do the job. It’s also worth considering hiring a professional if you are not confident or experienced. Ensure you have the proper tools and equipment to the job, and make sure you work safely. This can save you a significant amount of time and money in the long run and also help you to avoid any accidents.

Bathroom with lots of Blue Tiles

How to Remove Tiles in Just a Few Simple Steps

The method of removal you choose will depend on the type of tile and adhesive used. For ceramic or porcelain tiles, a hammer and chisel can be used to break and lift the tiles. If the tile is more difficult to remove, a jackhammer may be needed to help get in between the tile glue or mortar and the concrete.

Once the tile has been either lifted or broken into smaller pieces, use a scraper to remove the remaining glue or adhesive from the floor. If the adhesive is proving difficult to remove, a chemical adhesive remover or concrete grinder may be necessary.

How a Jackhammer and Trolley Can Make your Job a Breeze

Master Hire offers a wide range of jackhammers available for hire, suitable for different types of projects. For smaller jobs where space is an issue, we have small and SDS rotary jackhammers that are easy to handle and maneuver in tight spots.

Our large jackhammers can be mounted on a trolley that has an adjustable pitch and angle. This feature allows you to use the jackhammer in different angles for maximum efficiency and comfort. By adjusting the pitch and angle, you can reach the surface at a comfortable angle, making it easier to work on for extended periods of time, and avoiding any stain on your back. All our jackhammers come with attachments that can be easily swapped out to suit the specific task at hand. The tile lifter attachment is ideal for removing tiles and helping scrap off residual glue or help chip off cement based adhesives.

Safe Use of Jackhammers and Tile Removal Tools

Tile lifter chisels typically have a single bevelled edge. We recommend facing that edge to the concrete floor. With the single bevelled edges facing upwards the angle is greatly reduced and the impact is focus on the edge of the tile rather than towards the adhesive, at a point between the tile and concrete.

Creating and Maintaining a Safe Job Site

Using safety equipment is really important when working with jackhammers to removing tiles (it’s also important to prepare the area by covering any nearby surfaces with a drop cloth to protect them from debris). It is essential to protect your eyes, lungs and hands from potential hazards such as concrete dust, sharp tile shards, and shattering tiles. Goggles and gloves are essential to protect your eyes and hands from flying debris and chipped tile shards. A dust mask is also highly recommended to protect your lungs from inhaling the fine concrete dust that can be generated during the process (Concrete dust can cause respiratory problems and inhaling it can be dangerous).

It is also important to remember that the dangers of jackhammering and tile removal are not limited to just the person operating the equipment. Look out for people around you, as they can be at risk from flying debris and chipped tile shards as well. Sharp tile shards can cause cuts and injuries, shattering tiles can cause injuries to eyes and face. By using the appropriate safety equipment and being aware of the potential hazards, you can protect yourself and those around you from injury and keep the job site safe.

Old Brown Tiles

Different Types of Glue Used to Lay Tiles

When it comes to ripping up and replacing tiles, there are several types of glue to choose from, each with their own unique properties and applications. The type of tile and adhesive that was used, as some adhesives can be more difficult to remove than others.

Mastic tile adhesive is a popular choice for its flexibility and ease of use. It is a pre-mixed adhesive that is spread directly onto the surface before the tile is placed. This type of adhesive is best for small or irregular surfaces and can be used for both wall and floor tiles. Removing this can be as simple as scraping the glue off and can be tough and resilient enough that chemicals are required to fully remove it.

Old Broken Tiles with Mortar

Cement-based tile adhesives is the most common type you will find. It is often chosen for its ability to provide a strong bond and to withstand the weight and movement. Thinset Mortars (a type of Cement-based tile adhesive) is a popular choice for floor tiles, as it provides a strong bond and is suitable for use with tile types such as ceramic or porcelain. It is a dry, cement-based powder that is mixed with water before being applied to the surface. Removing this can be as simple as scraping the hardened glue off with a chisel or jackhammer. However it can be really tough and resilient enough that a concrete grinder is required to fully remove it and get the surface back to a smooth finish.

After the tile and adhesive have been removed, inspect the subfloor for any damage. If any is found, it should be repaired before you plan on laying any new tiles.

Choose Master Hire for all your Jackhammer Hire Requirements

A jackhammer and trolley combination is a valuable asset when it comes to tile removal. It’s a tough and time-consuming job, but with the right tools, it can be a breeze. The jackhammer packs a powerful punch, making short work of even the toughest tiles. The adjustable pitch and angle feature allows for a comfortable working position, making it easier to work on for extended periods of time and reducing the risk of strain or injury (better than struggling with a hammer and chisel). In conclusion, a jackhammer and trolley can greatly improve the speed and ease of tile removal and is highly recommended for tile removal projects.

At Master Hire, we understand that every project is different, that’s why we have a wide range of jackhammers available to suit all your needs. Our team of experts is always on hand to provide advice and guidance on which jackhammer will be best for your project, so you can get the job done quickly and efficiently.

Posted on

How Many Event Toilets for a Successful Function? (for 100+ People)

Master Hire has a large collection of portable toilets suitable for your functions, construction sites and even private events. Before you host your event you need to decide on the type of amenities you require, you need to work out how many portable toilets is enough? What type of toilets are best suited for your event and what are the logistics and maintenance requirements?

How many portable toilets do you need to hire for 100 guests?

How many porta potties for 1000 guests?! The number of event toilets you need at your function will vary depending on the type of event, the length of the event and the specific legal requirements for events in your area. For wedding receptions, birthday parties and work functions we recommend 1 event toilet per 50 people. You can average that up to 60 people or down to 40 people. There are many factors that impact on the number of toilets required.

  • How long is the event?
  • How long are the toilets required to be there? Do they need to be pumped out?
  • Is there alcohol at your event?
  • Is your demographic predominantly male or female, older or younger?
Portable Event Toilets

For outdoor events, things like a race checkpoint or finish line, you may only need one or two toilets for convenience. A trailer mounted toilet is best for these type of events, because they are so easy to establish. You can have a trailer mounted unit set up at the starting point and then quickly moved to the finish line. These units are fully contained and are easy to set up and pack down, only needing to stow the stabiliser legs and connect to a vehicle.

If people attending your function or event are consuming alcohol this will effect the qty of units you will need. Alcohol is a diuretic, which means the people consuming alcohol will require a toilet more often than normal. We recommend getting the ratio of toilet to attendees closer to 1:30 if alcohol is being consumed.

For an event where you will find lots of women attending, you might consider more toilets as there is often a longer queue for the women toilets. The gender signage on the front of the doors of toilets can easily be updated to suit your ratio.

Other demographics you should consider is the elderly and those using wheelchairs and anyone who may require assistance. There are specifically designed oversized toilets to suit wheel chair accessibility requirements and there are specialised toilets that have a ground level entrance so that people are not required to set up into the toilet like regular porta-loos.

Public Events

Portable Event toilets need to be cleaned and serviced at a much higher frequency to maintain hygiene. This includes cleaning the toilet thoroughly – replenishing water, chemicals and toilet paper. When food, drink and alcohol is served, the number of toilets needs to be increased due to a higher frequency of use (an increase of at least 30% is recommended).

  • <240 people – 3 event toilets, cleaned and pumped out daily (4 for an event of up to 12 hours duration)
  • 250-400 people – 4 event toilets, cleaned and pumped out daily (6 for an event of up to 12 hours duration)
  • 500-900 people – 6 event toilets, cleaned and pumped out daily (9 for an event of up to 12 hours duration)
  • 1000-2000 people – 12 event toilets, cleaned and pumped out daily (18 for an event of up to 12 hours duration)

Jobsites

How Many Portable Toilets for a New Jobsite? It is recommended that construction site toilets should be cleaned fortnightly as a minimum (based on up to 5 people @ 2 uses per day per 5-day week). The onsite toilet pump out trucks are often fit for purpose and have a waste tank, freshwater tank and other sanitisation requirements.

Private Events

When food, drink and especially alcohol is served, the number of event toilets needs to be increased due to a higher frequency of use (an increase of at least 30% is recommended). For convenience and to save on delivery costs we recommend hiring a trailer mounted unit which can be collected from any of our branches. These units require very little set up and can be towed behind any vehicle with a minimum tow ball rating of 750kg.

  • 1-10 people – 1 trailer mounted fresh water flush toilet
  • 11-30 people – 1 trailer mounted fresh water flush toilet
  • 30 people – 1 trailer mounted fresh water flush toilet
  • 60 people – 2 trailer mounted fresh water flush toilets
  • 120 people – 4 trailer mounted fresh water flush toilets

Master Hire has an extensive fleet of trailer mounted portable toilets to suit your function or event. All our toilets are fully self-contained fresh water flush and, for your safety, our range of trailer mounted portable toilets are complete with entry steps and handrails.

Councils in your area will have guidelines or laws around holding a large scale events. We recommend checking your regions requirements and State Legislation as to how what amenities are required for the scale and type of your event. Public events can be tricky if you don’t know exactly the number of attendees through something like ticket sales.

Private functions are a lot easier to manage as they are often smaller in scale and do not have legal requirements involved. Consider deluxe portable event toilets, accessible portable toilets or even shower toilet combination units.

Portable Event Toilets

How often do you need to empty a portable toilet?

Master Hire can arrange toilets to be pumped out and cleaned on site. Exactly how often that occurs can be completely up to you. However in order to maintain a clean toilets, reduce odour and ensure that the toilet waste tank is does not over flow, these waste tanks will need to be pumped out. We recommend sticking to some guidelines from experience and insight from the HRIA.

Installation Delivery and Maintenance of Toilets

Before toilets are delivered each unit is thoroughly cleaned in an approved wash down facility. Suitable chemicals are used to effectively and thoroughly clean down waste tank, fresh water tank, bowl and flap, walls, floors, door and roof. Master Hire’s fresh water flush units are always pumped prior to transportation and come ready to use.

Portable Toilet Interior

How Many Handwashing Stations Should You Hire?

It is critical that every toilet has a suitable place to clean and wash your hands after use. All of Master Hire’s portable toilets come with built-in sinks to wash your hands. We can also provide stand alone hand sanitizer dispensers and free standing, double sided wash stations with two individual wash basins, two soap dispensers and two paper towel dispensers. These units are fully self contained and feature a hygienic hands free foot pump for operation, holding up to 85L of waste water.

Choose Master Hire for your all Event Toilet Hire Requirements

Portable toilet rental periods can be anywhere from a few hours to a few months, you can even rent a porta potty for a day. We can deliver the them directly to you or you can collect a trailer mounted one from any of our branches. Delivery prices will vary depending on location. For Master Hire store locations and opening hours, see our contact us page.

Posted on

How Many Portable Toilets for a New Jobsite? (for 15+ people)

Master Hire has a large collection of portable toilets suitable for construction sites and public events. Before you have people start work on the jobsite you need to decide on the type of amenities you require and you need to work out how many portable toilets you need. How long are the toilets required to be there? How often do they need to be pumped out?

Construction Portable Toilets

How many portable toilets do you need to hire for more than 15 tradies?

The number of portable toilets for construction sites will vary depending on the size of the jobsite, the number of people onsite and the specific legal requirements for your workplace. For construction work there has to be a toilet available to each construction worker and these toilets must be located within the boundary of the workplace where the construction work is being performed. Where there are no or insufficient existing sanitary facilities it has become standard practice to provide non-sewer connected portable toilets.

Jobsite Requirements

Here are some noted best practices and minimum requirements.

It is recommended that construction site toilets should be cleaned fortnightly (based on up to 5 people @ 2 uses per day per 5-day week). The onsite toilet pump out trucks are often fit for purpose and have a waste tank, freshwater tank and other sanitisation requirements.

  • < 5 people – 1 construction site toilet, cleaned and pumped out fortnightly.
  • 6-10 people – 1 construction site toilet, cleaned and pumped out weekly.
  • 11-20 people – 2 construction site portable toilets, cleaned and pumped out weekly.
    • 21+ people – 2 construction site toilets (Add 1 Toilet for every 10 additional people), cleaned and pumped out weekly.

The minimum requirements (according to Queensland, Work Health and Safety, Regulation 2011) are as follows:

  • For 1 to 15 construction persons, there must be at least 1 toilet.
  • For 20 construction persons, there must be at least 1 toilet for the first 15 construction persons plus at least 1 toilet for the other 5, making a total of at least 2 toilets.

What type of Construction Toilets are suitable for your workplace?

We recommend you check Local Regulations for requirements, however straight drop toilets or chemical recirculating toilets are not suitable for most construction sites in QLD and NSW. For units not connected to a sewerage system, best practice is to have a number of fresh water flush portable toilets on site.

How often do you need to empty a porta-loo?

Master Hire can arrange porta-loos to be pumped out and cleaned on site. Exactly how often that occurs can be completely up to you. However in order to maintain a clean toilets, reduce odour and ensure that the toilet waste tank is does not over flow, these waste tanks will need to be pumped out. We recommend sticking to some guidelines from experience and insight from the HRIA.

These toilet pump out and cleaning schedules refer specifically to units that are not connected to a sewerage system. Costs for these regular pump outs can be reduced by installing a specialised units and connecting them to an existing sewerage system. These are known as Sewer Connect portable toilets.

Councils in your area will have guidelines or laws around holding a large scale events. We recommend checking your regions requirements and State Legislation as to how what amenities are required for the scale and type of construction jobsite. Jobsites with subcontractors can be tricky if you don’t know exactly the number of people onsite any any given time.

Choose Master Hire for your Construction Site Toilet Hire

Portable toilet rental periods can be anywhere from a few hours to a few months, you can even rent a porta potty for a day. We can deliver the them directly to you or you can collect a trailer mounted one from any of our branches. Delivery prices will vary depending on location. For Master Hire store locations, portable toilet prices and opening hours, visit our contact us page.

Posted on

Proudly Supporting the Care Kits for Kids QLD Organisation

Master Hire and staff are proudly supporting the Care Kits for Kids QLD organisation. These affected children, with nothing but the clothes they are wearing, are placed in a safe and secure environment.

Care Kits for Kids QLD is an organisation who directly provide assistance children in crisis through these organisations:

? QLD Police Child Protection Units
? QLD Child Safety Services
? Domestic Violence Services
? Foster and Kinship Care Services
? Indigenous Assistance Services
? Programmes assisting children in crisis eg floods, fire, refugees, schools etc.

To donate visit: https://carekitsforkidsqld.org.au/donate/

Posted on

How to maintain a top quality lawn

To get the most out of your lawn, some maintenance is required. Keep your lawn green and healthy all year round with these simple tips.

WATERING – How often should grass be watered?

After the initial establishment period, it is recommended to give your lawn one good soaking per week in summer and one good soaking every 2-3 weeks in winter. If you are unable to water your lawn, most couch lawns will not die, but will likely lay dormant until the next heavy rain.

MOWING – How often should you mow your lawns?

Your lawn should be mowed at least once a week in summer and once every 2 weeks in winter using a quality lawn mower. The reason for mowing is to keep your lawn looking smooth and healthy and it helps to control weeds. Different lawn types have different mowing requirements, but generally, you should avoid long periods between mowing. Only remove one third of the leaf per mow. If your lawn is overgrown, gradually reduce it to the correct height over a few mows. Be careful not to mow too short as this will invite weeds to grow and put your lawn under stress. General mowing guidelines for three common types of lawns are:

  • Green couch (15-30mm)
  • Buffalo grass (30-50mm)
  • Kikuya (30-50mm)

FERTILISING – When should I apply fertiliser to my lawn?

Fertilising your lawn regularly will help keep your lawn in great condition and help fight off weeds all year round. Fertilise your lawn 3-4 times per year with a complete lawn fertiliser. There are many different types of fertilisers available including chemical, organic, and liquid. These can be bought at all reputable garden centres and landscape supply centres.

WEEDS – How do you stop weeds from growing in your grass?

Regular mowing and fertilising is usually sufficient to keep weeds at bay. Many small weeds can be pulled out by hand, but to get the roots out, you may need a weeding trowel or other mechanical device. Longer lawns are better equipped to out compete weeds, so aim to keep your lawn the recommended height all year round. If weeds do become a problem, spray with recommended herbicides.

LAWN GRUB – How do you get rid of lawn grub?

There are many insect pests that can attack your lawn and lawn grubs in particular can affect all types of turf and can be especially damaging in a new lawn. If you suspect you have lawn grub, chemical treatment with a recognised lawn grub killer should rid your lawn of this problem. For surface dwelling pests, apply the chemical treatment in the late afternoon and combine with a light watering in. For root eating pests, the chemical treatment will need to be watered through the lawn and thatch layer to ensure contact with them. This will require a higher concentration of chemical and a heavy application of water to reach the target area.

AERATING – What is the best way to aerate my lawn?

Soil compaction in lawns is a common problem and is generally caused by heavy foot traffic, sport and vehicles. To test for soil compaction, push a garden fork or screwdriver into the lawn and soil. If it slides in easily, then your lawn and soil is good. If it doesn’t slide down to about halfway, then your soil is too compact. To fix compacted soil, you can use a several techniques depending on your lawn area. For small areas, you can use a garden fork. Start by pushing it into the soil and wiggle it back and forth slightly. Repeat this about every 50-100mm apart. A spiked lawn roller can be hired for light work, however this will not ‘core’ your lawn. For ultimate results, hire a petrol driven lawn aerator machine from your local hire store. This will allow instant access to air and water into the soil. These machines take out plugs from the soil which can be easily raked up and disposed of. Once your lawn is cored, you should top dress your lawn with washed river sand which will fill the holes and enable air and water to still penetrate.

DETHATCHING & SCARIFYING – How do I know if my lawn needs scarifying or dethatching?

Over time, your lawn can build up with thatch which can make your lawn thick and spongy. If not addressed, over years your lawn can gradually rise in height and the roots may end up growing in the thatch layer, not the soil, causing an unhealthy lawn. Thatch can cause mowing problems as it may be difficult to push through the lawn and thatch can also hinder oxygen, water and other nutrients from entering the soil. Regular mowing with a mower and catcher will help prevent thatch build up, but if this is not enough to remove the thatch, you can try other methods. For small lawns with minimal thatch, scraping your lawn with a metal rake may be sufficient. For larger areas and thicker thatch, it’s best to use a dethatcher, also known as a lawn scarifier. Using a specialised scarifying machine will remove not just the thatch, but also most of your lawn, leaving just the roots and stolons. As long as the timing is right, your lawn will recover quickly. For warm season grasses like buffalo, scarifying and dethatching should only be done during growing season where there are no chances of frost. Mid to late spring is the ideal time.

Posted on

How to establish a top quality lawn

As with any garden project, preparation is crucial for success when installing your new lawn. Make your new lawn project enjoyable and effective with these simple tips.

1. PREPERATION

Once you have determined what area you want to lay your new lawn, you’ll need to remove all weeds, grass and other vegetation. If you only have a few weeds, you could remove them by hand, remembering to pull out the roots, however if you have lots of weeds, you should consider hiring a turf cutter. This machine is designed to cut off the existing turf and weeds and can be adjusted to different heights depending how much soil you want to remove. You should also consider using a quality herbicide or weed killer a few weeks prior to removing the old turf.

2. SOIL UNDERLAY

After all the weeds, old grass and soil have been removed, it’s recommended to spread out some good quality soil underlay to help your new turf take hold. The type of soil you use will have an impact in how well your turf will grow. Soil is made up of several things including organic matter, minerals, water, air and living organisms. Each play a necessary part in helping your lawn and garden. If you have a large area to spread soil, you could hire a mini loader with a 4in1 bucket. This unit will make the job much easier and save your back and arms from many trips using a shovel and wheelbarrow.

3. DRAINAGE

Drainage is also critical to consider, especially in times of heavy rainfall. On some level sites or sites that slope towards a building, surface drains or even underground drainage may be required to pipe excess water to the storm water system.

4. LEVELS

As part of the turf installation process, you’ll need to ensure your soil levels are right. You should consider the finished height of the lawn and the level of other surfaces such as paths, garden beds. There are many techniques you can use when trying to level your soil prior to laying the turf and this will depend on if you have a naturally sloping block or level block. Start by levelling out your soil around the outer edges where your finished height is already determined. Use a steel rake or lawn levelling rake for best results. Once the outer edges are finished, you can use a stringline across the ground set at approximately 50mm above the soil, using it as a reference point and level the soil accordingly. A water filled lawn roller is a great tool to use across your soil to ensure it is firm under foot. If the ground is too soft, the new turf will sink in places resulting in an uneven surface which is quite difficult to fix and can look unsightly.

6. LAYING YOUR LAWN

If possible, aim to have your new turf delivered on the day you intend to lay it and ask to have it dropped off as close to your work area as can be. The first step is to start laying from the bottom of any sloped areas and always use full rolls or slabs around the edges. Always remember to lay across the slope. The next step is to stagger the joints like brickwork. This helps prevent drying out and soil erosion on sloping ground by heavy rain. Ensure the turf is laid close together and avoid any gaps as these can dry out and cause an uneven surface. The third step is to cut the turf with a sharp knife or shears being careful not to stretch the turf or cut into too small pieces as these will dry out too quickly.

7. WATERING

Once you have laid your new turf, you will need to give it a thorough soaking. Roll the turf with a lawn roller once more to ensure the roots have contact with the soil. The turf must be very wet on the underside. A sprinkler will give much better results than hand hosing. New turf must be always kept damp for the first 2-3 weeks. Avoid walking on your newly laid turf for the first 3-4 days.

8. MOWING

You should more you new lawn within the first 2-3 weeks with the lawn mower on a high setting. Then every week thereafter, lowering the mower one setting at a time until the desired length is reached. It is also recommended never to remove more than one third of the leaf per mow. General mowing guidelines for three common types of lawns are:

  • Green couch (15-30mm)
  • Buffalo grass (30-50mm)
  • Kikuya (30-50mm)

9. FERTILISING

You can fertilize your new lawn approximately 6 weeks after laying, using a complete lawn fertiliser. It is best to fertilise late afternoon and water in immediately.

Posted on

Master Hire is now certified in three Management Systems – Quality, OHS & Environment

Master Hire is now certified in three Management Systems - Quality, Safety & Environmental

For more than 30 years, Master Hire has remained committed to our customers through managing the quality of our products and services, our impact on the environment and the health and safety our team, customers, suppliers, and visitors to our branches and sites. Our Integrated Safety, Quality & Environmental Management System meets ISO compliance requirements and has now been third party certified to the relevant standards. These standards align with our company culture and values and assists our team to remain focused on what is meaningful to you, our customer. Our team strives each day to continually improve every aspect of our equipment and service experience, because we are Built on Service.

OCCUPATIONAL HEALTH & SAFETY: ISO 45001

Master Hire is committed to providing a safe working environment and safe systems for everyone involved who comes in contract with our company. We believe that safety is no accident. It is the result of diligence and having and following clearly defined procedures. Our Integrated Management System is certified to comply with ISO45001:2018 – Occupational Health and Safety Management Systems. Master Hire is proud of our excellent safety record which is a direct outcome of our team following work instructions, operating procedures and complying with our WH&S Policy. Our company wide safety and equipment compliance program ensures that our equipment is checked, cleaned, and serviced before each hire to meet the needs of our customers.

QUALITY: ISO 9001

Through the successful implementation of our Integrated Quality Management System and our Quality Policy, Master Hire can guarantee the processes and procedures used to operate our business are compliant with and go well beyond the requirements of the standard. Master Hire is certified to ISO9001:2015 – Quality Management System. Master Hire is committed to nurturing a culture that delivers consistent quality services and products in an effective, efficient manner to the benefit of the customer and our business. This means when you hire from Master Hire, you are guaranteed a quality product with quality service from experienced and well-trained staff.

ENVIRONMENT: ISO 14001

Master Hire aims to provide a sustainable working environment where all activities carried out on our premises or undertaken by our team members are conducted in such a way that no or minimal harm is created to the environment. Master Hire is now certified to ISO 14001:2015 Environmental Management Systems. We regularly look for improvement opportunities so that we meet or exceed our environmental and sustainability objectives which are outlined in our Environmental Policy and our Integrated Safety, Quality & Environmental Management System.

Our policies are available to view and download from our website.

Master Hire is a leading Australian equipment hire company with branches throughout South East Queensland and the Mid North Coast of New South Wales. For more information, contact one of our branches on 1300 107 107 or email us at info@masterhire.com.au

Posted on

Can I put a whole tree through a Mulcher or Wood Chipper?

Master Hire Mulcher in use

There are a number of ways you can get rid of a fallen tree in your back yard. You could turn it into firewood by stacking it and store it up off the ground to dry out. You could also take it to the green waste facilities, piece by piece, on the back of a trailer or you could even turn it into garden mulch.

Do I need to trim branches before using a wood chipper?

Master Hire’s large mulchers are equipped with feed rollers in the neck of their feed tables, which allows the blades to engage with the wood at a controlled rate. To prevent the machine from clogging these rollers move in both directions forward and reverse depending on its load.

While these rollers are designed to regulate the materials being fed into the mulcher they can also create some hazards while mulching your trees. Any large limbs or straggling branches can catch on clothing or ropes as they are fed into the rollers. It is critical that the area around the mulchers is kept clear and free of needless debris and any ropes used in felling the tree are removed. Anyone not operating the mulcher should stay away from the machine while it is in operation.

To help the materials flow smoothly into the feed make sure you trim branches to a manageable size. This may require making another cut in the tree branch so that it does not catch on anything as it is fed into the mulcher by the feed roller.

The best time to put wood through a mulcher is right after it has been cut down. Master Hire’s 9 inch mulcher can take branches or small trees up to 220mm in diameter. So that means you could feed the whole tree trunk into the mulcher – large end first and the branches and other leaves will slowly be dragged into the blades and mulched up as well. If you think there are too many branches that might catch or drag, you should trim it using a chainsaw into smaller manageable sections.

Can a wood chipper be used to shred tyres?

Tyres are not to be put through any wood chipper. Tyres have metal threads internally that will cause damage to the blades. We recommend recycling tyres at an appropriate site where they will be broken down and recycled. There are a number of creative ways you can use a tyre around your garden.

Can I use a garden mulcher to shred papers?

While its possible, its practically very difficult. We would highly recommend appropriate services that specialise in destruction and disposal of important documents or papers. It is much more financially practical as well. Since hiring a service to safely shred paper for you will end up costing you only a fraction of the cost compared to hiring a mulcher. Plus these services often come to you collect and destroy the papers at your location.

Can you put lumber or a 2×4 in a wood chipper?

Depending on the size of the lumber and the type of wood chipper you are using you can feed just about any type of wood through a wood chipper. Some of the reasons you would put lumber through a wood chipper are as follows:

  • The wood has bolts or nails in it
  • The diameter of the wood is too wide for the chute of the wood chipper
  • The type of mulcher blades are not designed for it
  • The wood is treated

Clean lumber, untreated timber or dead wood is fine to be put through a heavy duty mulcher. Check the manufactures guidelines and specifications to make sure the type of wood is suitable for the mulcher. Putting tough dried out timber through a mulcher that is not suitable can cause damage to the machine and blades.

What Size Wood Chipper do I Need?

Tackling a major garden project involving multiple trees can mean a number of trips to the tip and can some times take days. Strapping branches onto your trailer and then unloading branch by branch at the green waste section will take hours and hours. Depending on the number of trees you are trimming, pruning or even cutting down, wood chippers make light work of heavy awkward branches. Depending on the size of your material you could use a smaller mulcher or a may need a larger wood chipper.

When to use a small wood chipper

Master Hire’s small wood chippers are perfect for chipping small to medium branches into garden mulch. These machines are designed to tackle smaller branches, bushes and small low hanging tree branches. The garden mulchers that are used to shred and mulch up smaller branches and leaves gives you a much finer mulch that will decompose much faster. Keep in mind its the material you send through the mulcher not the size of the mulcher.

These smaller garden mulchers cannot be used to mulch up palm fronds, stringy plants like lantana or tree limbs older than 3 days. Small trees and branches that have been cut down in the last 3 days are considered green wood. As these branches and stumps get older they dry out and become much harder as the moisture leaves the wood. This hard, aged wood can be too much for some smaller mulchers and can even damage the blades.

Should I choose to use a large wood chipper?

Master Hire’s large wood chippers are a great way to save your self hours when clearing your garden. You can even use the left over wood chips to cover your garden. Medium to large branches will need to be fed through a larger heavy duty mulcher. These larger mulchers are designed to take fibrous plants as well as aged wood. They are also equipped with internal feed rollers to help pull in larger heavier branches and do most of the hard work for you. The heavy duty wood chippers like this machine will give you a much more fibrous mulch, with long shredded parts of wood and leaves.

Ideally mulch used for your garden is made up of a combination of bark, wood, and leaves. As these ingredients break down, they slowly provide small amounts of nutrients to your soil. Master Hire’s large wood chippers are the perfect machine to shred all these materials into a manageable mulch for your garden.

Very large branches and full-grown trees will need to be cut up into manageable sized pieces and fed into an industrial or commercial sized wood chipper. Sometimes these units are paired with a truck and canopy and the materials are fed into the rollers via a winch. These really coarse chips you see in parks and other places come from these really large industrial wood chippers splitting up really hardy materials where the main material is large tree trunks.

Wood Bark Chips

Safely setting up your wood chipper

Make sure where you are working is an appropriate distance from where you are cutting down tree and branches. Ensure the wood chipper is set up on an level surface and that all appropriate wheel choke and handbrakes are in place or engaged. Adjust or aim the chute into an open space in your garden or aim it into a trailer. Never aim point it towards people, where people are walking, toward vehicles or windows. The wood chips and debris that are emitted from the mulcher chute can cause serious damage or injury.

Master Hire 9in Mulcher

How do I Transport the mulcher?

All of Master Hire’s wood chippers are trailer mounted which means you can transport them your self as long as you have a vehicle with a towing capacity capable of pulling the machine. While Master Hire offer’s delivery options to all our customers, we recommend that Master Hire these very powerful machines are always attached to a vehicle while in use. 

Are wood chippers or garden mulchers dangerous?

Like some machinery, if used incorrectly wood chippers and garden mulchers can be very dangerous and can lead to serious injury and even death if safety measures and instructions are not followed. Master Hire’s wood chippers come with a number of safety features depending on which model you choose to hire. These safety features are designed to keep hands and limbs away from the most dangerous parts of the machine while in operation. There are also multiple emergency stops designed to stop the feed roller from feeding any material towards the blades.

Master Hire’s free customer hand over includes basic training to ensure you can operate the equipment confidently and safely at all times. We also include the operators manuals with all of our garden mulchers and large wood chippers. All of Master Hire’s advice should be treated as guidance only and you should always read the manufacturers instruction manuals and hazard assessments before starting your project.

Can I remove a tree from my backyard myself?

First, ensure the size and scope of the job is within your capabilities. If you don’t think you can remove the tree safely and confidently, then consider having it removed by a professional.

Make sure the tree you are cutting down will not fall on houses or damage fences. Make sure the space you are working in is safe, clear the yard of all unnecessary items and animals, and ensure you are working with all the appropriate safety equipment.

Depending on how big the tree is you might need to trim smaller branches first. These can often be reached with a pole chainsaw. Once the tree and surrounding area has been clear use a chainsaw to cut down the tree. There are many various techniques to cutting down a tree, including notches, rope and wedges to fell trees safely in a certain direction.

There are a number of ways you can remove a tree from your backyard. Here are a few things you will need check and a list of tools you will need.

Checks & Planning

  • How tall is the tree?
  • Which way is the tree leaning?
  • Are their any objects near it that could be damaged when it falls?
  • What do I do with the tree once I cut it down?
  • Do I need to get Council approval?

Tools & Equipment

  • Chainsaw/Pole Saw (depending on how tall the tree is) & Ropes
  • Trailer & Straps or Heavy Duty Wood Chipper
  • Stump Grinder & Shovel

How do I remove a stump in my backyard?

After all the hard work cutting down and disposing of a tree you will be left with one or more tree stumps. The best way to remove a stump is with a stump grinder. These units are designed to undercut unsightly tree stumps and roots. The machines work by spinning a wheel of tungsten tipped teeth that will grind and chip away at the wooden tree stump. You can find out what size stump grinder you need here.

First, you need to prepare the stump for grinding – Start by cutting the stump as close to ground level as you can (with out putting the chainsaw chain into the dirt). Make sure any roots that are protruding up too far off the ground are dug out around them by using a shovel. Any dirt or debris left to close to the stumps roots can cause damage to the stump grinders tungsten tipped teeth. Ensure the stump has a flat even surface on which to operate and make sure you are using protective safety equipment to protect you from sawdust and wood chips.

Getting your hands on the tools for the job

Unless you’re planning on using the stump grinder, mulcher or chainsaw day in day out, the most efficient way of getting your hands on the right tool is to rent one. Master Hire has a range of gardening and landscaping equipment and the all the information you’ll need to use them. Plus, you can hire the equipment for only a few hours if need be or even a few weeks. The choice is yours.

Contact Master Hire

Master Hire has a large network of stores that covers much of South East Queensland and the mid north coast of New South Wales. We hire out much more than just stump grinders and mini loaders. We’ve got air tools & compressors, cherry pickers and scissor lifts, equipment for cleaning, compacting, concreting, earthmoving, generating power, lighting, scaffolding, trailers, tipper trucks and more. Master Hire is a family owned and operated company with over thirty years of experience and was recently awarded Australian Rental Company of the Year by the Hire and Rental Industry Association.

If you’re looking to rent or searching for another piece of equipment to hire, we’ve got you covered. If you’ve got questions about which piece of equipment is best for the job at hand, or about how to best use it, Master Hire will look after you. Get in touch today by sending us an email or call 1300 107 107.

Posted on

Master Hire and Brycker Hire Coffs Harbour to join forces

On Tuesday 8th December 2020, Master Hire will settle the purchase of local Coffs Harbour hire company, Brycker Hire, having been approached by Brycker’s owners to explore a sale opportunity. For more than 48 years, Brycker Hire has served the Coff’s Harbour and New South Wales’s Mid North Coast with hire equipment and associated services. The Boards of both companies are fully supportive of this transaction – with every customers’ interest at the forefront of this decision.

Bryker-Hire

Master Hire is a multi-award winning, family owned and operated equipment hire business which began in 1990. With a fundamental philosophy of “Built on Service”, Master Hire continues to serve a wide range of customers including residential DIY, trade contractors and government departments with late model, quality equipment and great service. Master Hire is proud to employ locally within the Coffs Harbour area, and there are opportunities for existing Brycker Hire employees to join the Master Hire team. Master Hire has 7 branches and nearly 100 team members throughout New South Wales and Queensland. Master Hire has supported the area in and around Coffs Harbour since 2014, having previously operated a branch in Macksville and having a physical presence in Coffs Harbour for nearly 2 years.

Master Hire’s new Coffs Harbour branch located just a few minutes south of Brycker Hire, features drive thru facilities, ample parking, multiple equipment loading bays, easy street access and a huge range of modern hire equipment.

Equipment Hire Company in Coffs Harbour

Master Hire offers delivery and pick up services throughout the region, a 24/7 back up support service and was recently awarded Australian Rental Company of the Year by the Hire and Rental Industry Association. Master Hire and Brycker Hire would like to thank the local Coffs Harbour community for your business and look forward to welcoming you to our new location so you can experience the award-winning service at Master Hire.

Master Hire Coffs Harbour and Brycker Hire Join Forces

For more information, contact Master Hire on 02 6653 3133 or visit our website https://masterhire.com.au/equipment-hire-in-coffs-harbour/